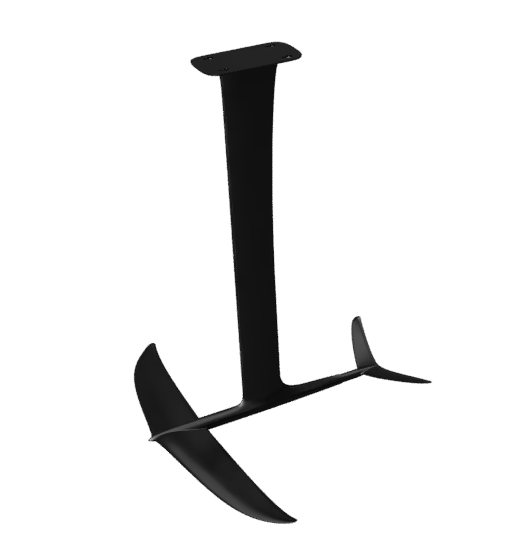
I am building a hydrofoil, for wing foiling. This is not an easy project, it involves designing the hydrofoil – calculating lift, drag and stability, detailed design in CAD, making molds, making the product from carbon fiber and epoxy, finishing it, and finally using it on the water. Then usually, there is something that needs improvement, and a new iteration is started.
A hydrofoil has several parts: front wing, stabilizer, fuselage and mast (also called strut). In my design, the mast and fuselage are combined into a single piece. The front wing and stabilizer can come apart for transport.
For making molds, I use the large CNC machine at the Makerspace. Professional companies make molds from specialized tooling block, aluminium or steel, which are all very expensive. I do this as a hobby, so I don’t want to spend too much on molds; I usually make just a few products from a mold so it does not need to be made for serial production. I have found a way to make good-enough molds from inexpensive MDF, by vacuum-infusing it with epoxy resin.
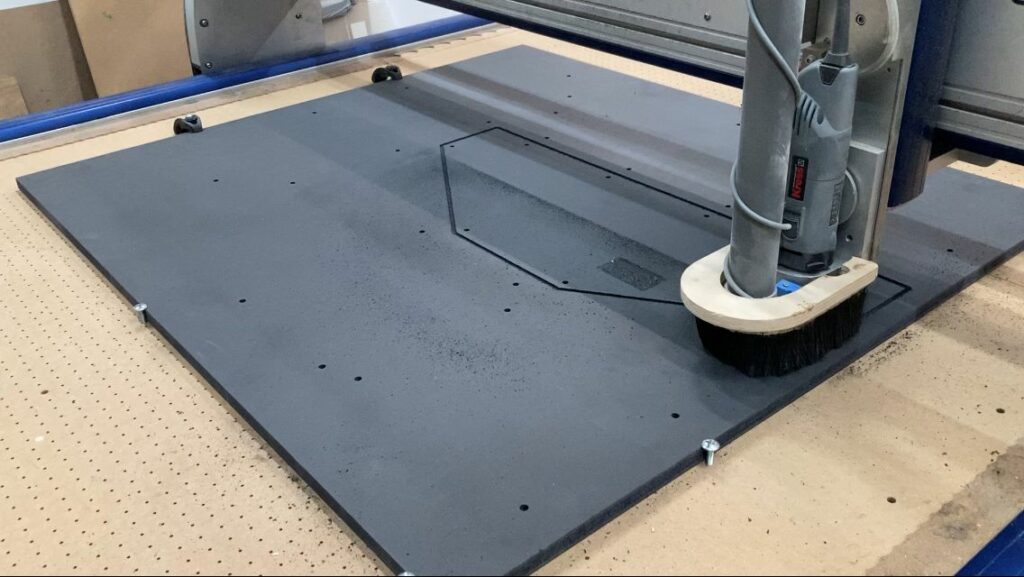
The mold in these pictures uses high quality colored MDF, but the cheaper, normal MDF works just as well. A mold usually has two halves. First the MDF is cut into several layers to get the required thickness, with a few holes needed to fit them together. The layers then get glued together with epoxy, with an added layer of plywood for strength. This block is then put in the CNC for a first, rough pass.
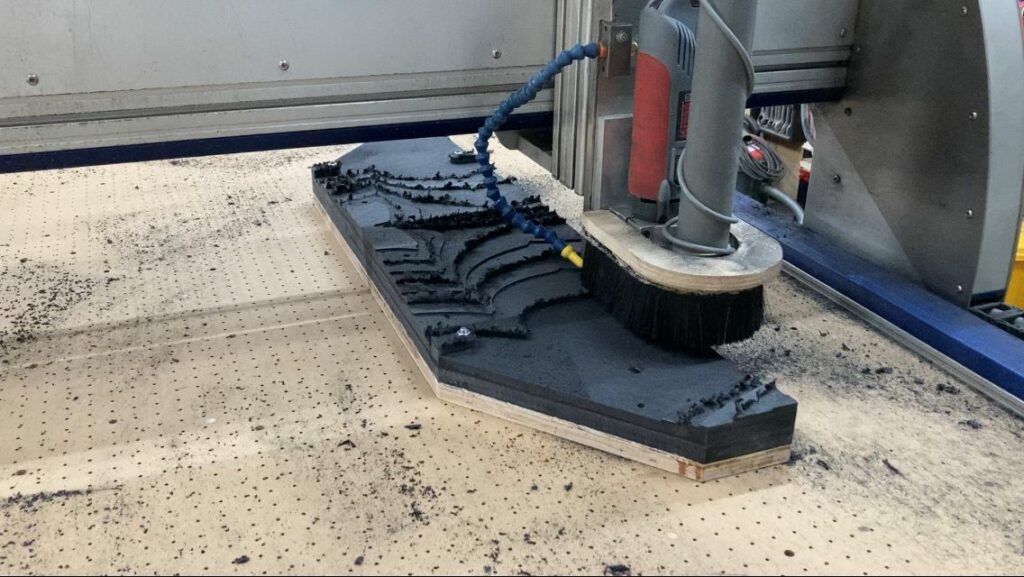
MDF without surface treatment is very soft, sensitive to moisture and not really suitable as a mold material. After CNC cutting It can be coated with epoxy to stabilize and finish it, it will absorb quite a lot and after that it gets a better surface. But a lot of sanding and polishing is needed and the resulting shape will not be very precise. Re-cutting it on the CNC is possible, but I found that the coated layer is too thin to reprocess without cutting through the coating layer somewhere as the MDF will have shrunk or expanded.
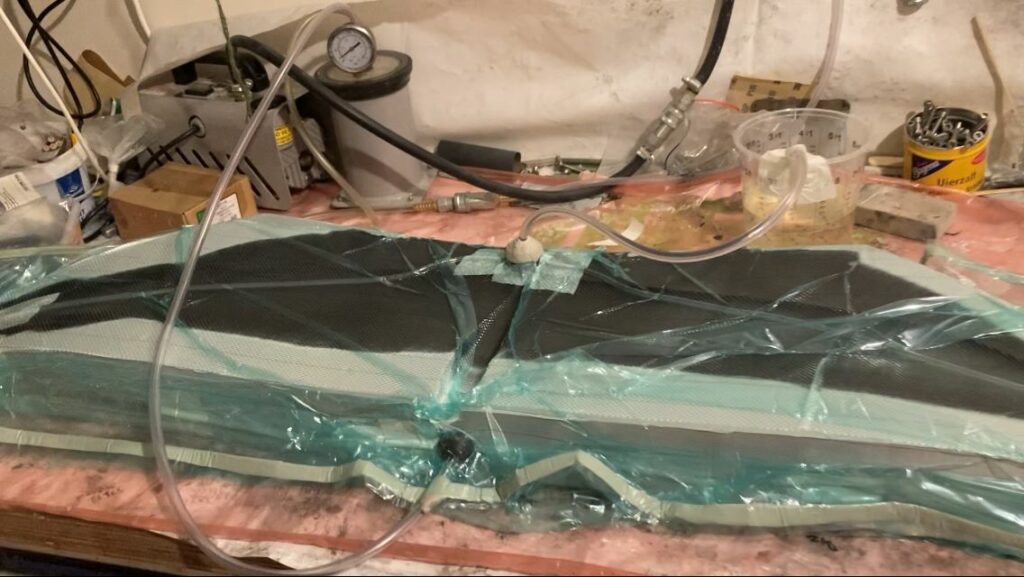
The solution to this is getting the epoxy to penetrate deep into the MDF, by using vacuum infusion. After the first cut, which leaves 0.5mm of material over the final dimensions, I wrap the mold with peel ply, put flow mesh on the mold surface, wrap the mold in a vacuum bag, and then vacuum infuse the mold. The MDF can absorb a huge amount of epoxy, even when using normal laminating resin instead of low viscosity infusion resin. I try to get a layer of around 5 mm, which needs around 5 kg/m2 of epoxy. The mold in the picture needed 1.3 kg of epoxy resin for each half.
After the epoxy is hardened and vacuum bag is removed, the outer layer will be hard and tough, suitable for finishing on the CNC with enough tolerance to compensate for deformations that may have occurred.
The mold is put back onto the CNC and a finishing operation is started, removing the final 0.5 mm to get to exactly the final dimensions, using a small ball end mill and very small step-over. This leaves a very nice surface finish. I also add positioning holes and add more bolt holes. The mold is finished with sandpaper, mold sealer, and release wax.
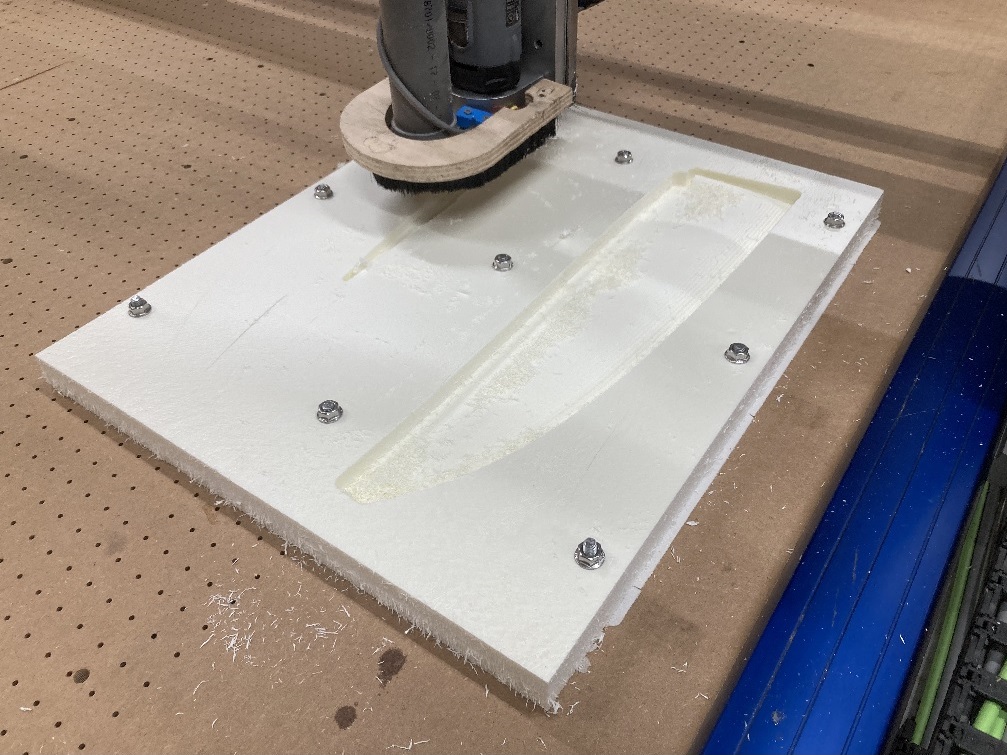
I also need something to fill the inside of the wing. The carbon outside shell is around 3 mm thick in the center and around 1.5 mm at the tips, and having a core that fits precisely in the remaining inner space is important to get a strong and lightweight part. I use XPS foam as core material, which is cut from inexpensive insulation foam board on the CNC.
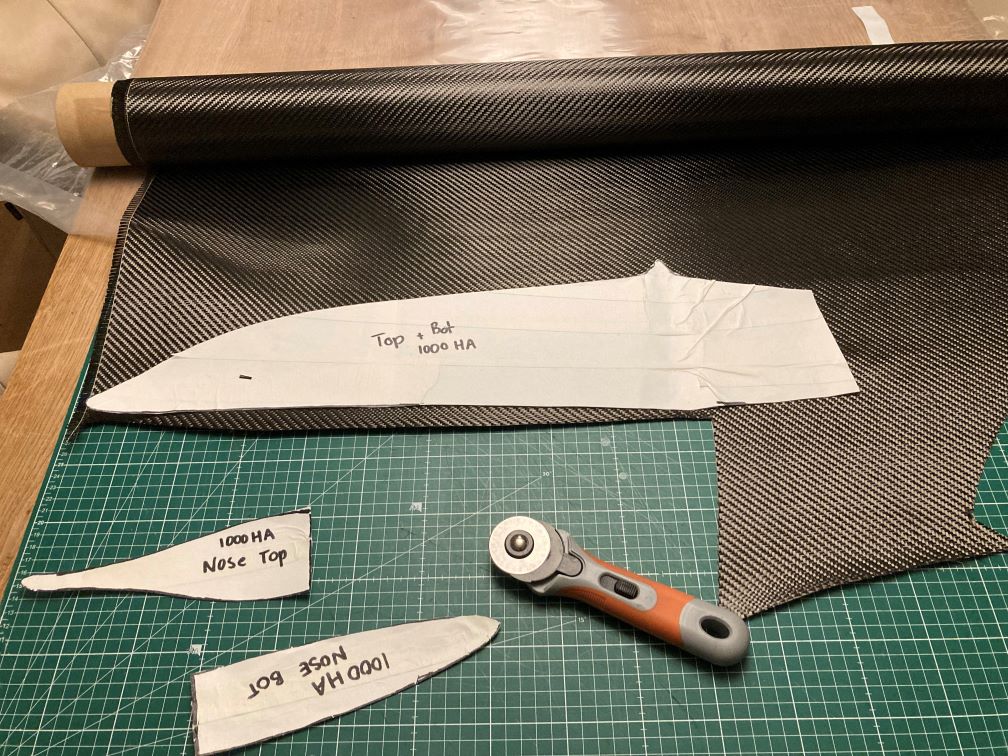
The connector that connects the wing and fuselage is made as a separate part and glued into the front wing. It needs a precise fit and has threads for screws in it, this part is made separately in another mold using the vacuum infusion process. I may write a separate blog about it, as this part has been very challenging and it took four design iterations to get it right. When the mold is finally finished, I make paper templates for cutting the carbon fabric by putting painters tape into the mold, removing it and sticking it flat on a sheet of paper. Cutting the carbon fabric is then done using the template and a rotary cutter.
The first layer is fixed into the mold with spray glue so it stays in place. The first layer is oversized a bit to create a flange, that will be removed later, leaving a clean split line. Four layers of carbon fiber are wet-laminated into the mold, overlapping in the middle. The core and connector are then placed into the mold, some extra resin (thickened with micro balloons) is poured in and the two parts of the mold are closed and bolted together with long M8 bolts and nuts that are treated with release wax. This process is a bit messy, resin comes out as the pressure increases by slowly tightening the bolts.
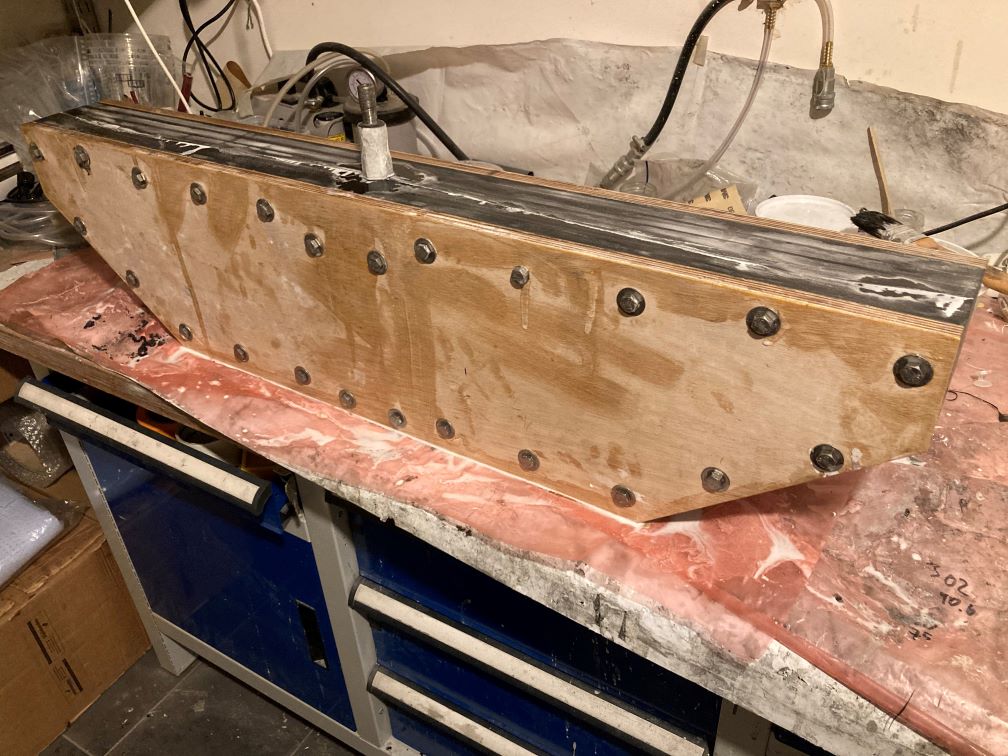
The closed mold is then left for 24 to 48 hours. When the resin is hardened, the bolts can be removed, and the mold can be opened to reveal the much-anticipated result. This is an exciting moment: if the layers were nicely laminated and the fit was just right, it can come out almost perfect. But often, air gets trapped near the surface, forming small pinholes or even larger bubbles, creating surface imperfections. These need to be filled and sanded, which is not a lot of fun to do.
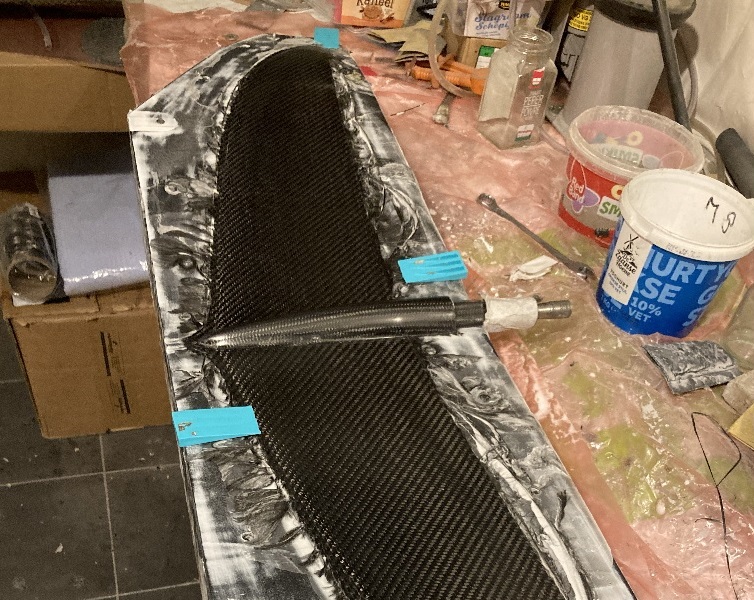
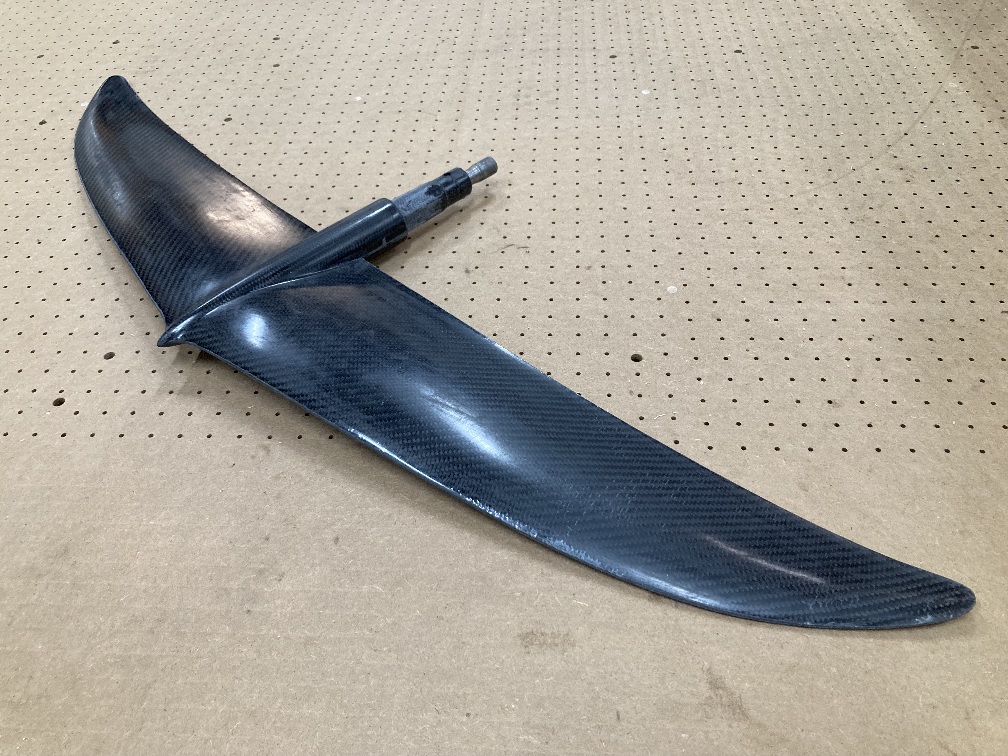
This wing came out quite nice, there was only one small surface imperfection. I removed the flange using a multi-tool, filled the imperfection with a few drops of epoxy, and sanded the surface with 400 grid waterproof sandpaper.
The new foil wing was ready just in time for the strong winds predicted for the weekend.
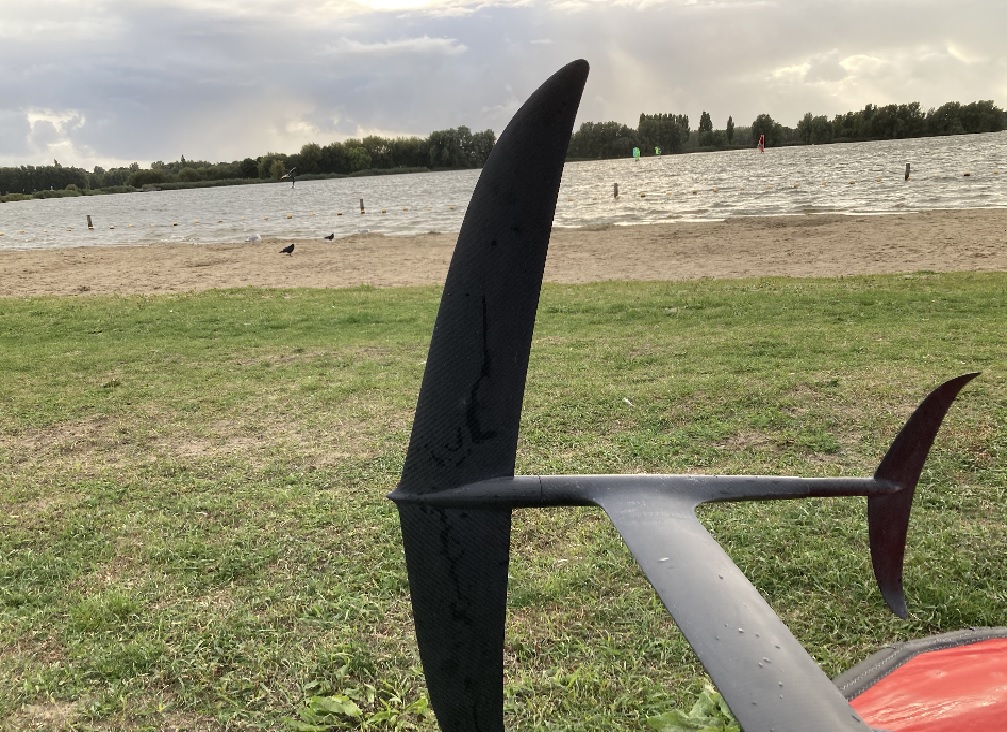
On the water the foil was really fast, and getting enough speed to lift it out of the water was easier than I expected for such a small foil wing. This foil is a lot thinner than the ones I made before, and it did have some noticeable flex, which made it feel a bit unstable sometimes. I’ll have to make another one, using a few more layers of carbon to make it more stiff. But, all in all, I call this project a great success.